Category Archives: Main Dish

Chicken and Dumplings

Chicken and Dumplings


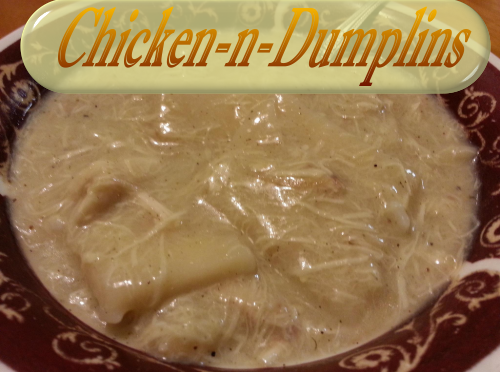
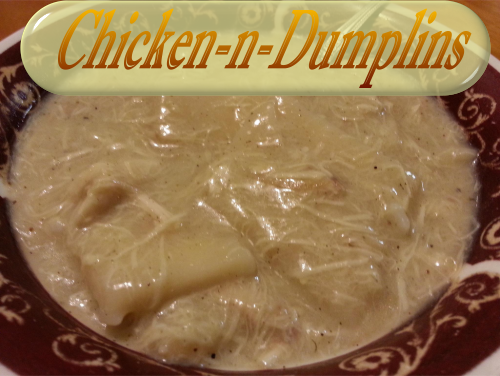
Chicken and Dumplings is my most requested meal from my kids.  It takes some work to make this recipe, but it is absolutely worth it.  There are shortcuts you can take to speed it up a bit but the results won’t be the same.  You get out of something what you put into it.  So take your time some Sunday afternoon to make this old classic recipe: Chicken and Dumplings.

To make this recipe, you will need a big pot, large enough to fit a whole chicken.  You will also need a rolling pin to roll out the dumplings.  To mix and knead the dumpling dough, I use my Kitchen-Aid stand mixer and a dough hook.  If you don’t have a stand mixer with a dough hook, you are going to have a bit more manual labor involved.  Get a Kitchen-Aid stand mixer, you will thank me a million times over, trust me.  They are an awesome tool and I LOVE mine!

KitchenAid Artisan® 5QT Mixer KSM150PS-Blue Willow Blue Willow

Ingredients for Chicken & Dumplings:

A Chicken – Giblets removed and thrown away
water
2 tsp. poultry seasoning
2 tsp. sage
1 bay leaf
salt & pepper
32 oz. carton of chicken broth
all purpose flour

Farberware Classic Stainless Steel 8-qt. StockpotPlace the chicken* into a large stock pot.  (Mine is just like this one.)  Add enough water to cover the chicken.  Add the bay leaf, 1 teaspoon of poultry seasoning, 1 teaspoon sage, 1 teaspoon salt and 1/2 teaspoon pepper to the water.  Bring to a boil, reduce heat and simmer until the chicken is cooked and is falling apart.  Remove the chicken to a bowl and allow to cool enough that you can handle it.

*If you don’t want to use a whole chicken, you could substitute boneless chicken breasts or thighs.  Your broth won’t be as flavorful so you would want to add some chicken bouillon or stock base and use less salt.

While the chicken cools, make the dumplings.

Put 2 cups of flour in the bowl of your stand mixer.  Add 1 cup chicken broth to the bowl.  With the dough hook attachment, stir until the flour and broth form a ball.  Add additional flour if your dough is too sticky.  You want it to form a ball and it will pull itself off the sides of the bowl.  Pick up the dumpling dough ball and sprinkle a light dusting of flour over the entire surface.

Clean a 2 foot area of your kitchen counter where you will roll out your dumplings.  (I’m a germophobe so I usually use Clorox wipes and wipe the counters with a clean wet wash cloth and dry thoroughly.)

Dust the counter with some flour and also dust your rolling pin and use your hand to spread the flour over the entire rolling pin surface.  Roll out the dumpling dough into a rectangular shape to a thickness of approximately 1/4″.

Using a pizza cutter, cut the dough into 1 1/2″ strips and cut again crosswise to make squares.  Dust lightly with more flour.  (This helps to thicken the broth.)

Once the chicken is a safe temperature to handle, remove the chicken meat from the bones.  Remove any icky parts like veins, gristle, etc.  Cut the chicken meat into bite sized chunks.

Strain the broth through a strainer and clean the stock pot out to get rid of the bathtub-like ring from boiling the chicken.  Return the broth and the chicken to the pot.  Add the carton of chicken broth and remaining seasonings and taste the broth, adding more salt & pepper if needed.  Bring to a boil.

Add the dumplings a few at a time to the boiling broth, stirring so that they don’t get clumped together.  Cover the pot and simmer for 15 minutes or until the dumplings are cooked all the way through.  To test this, cut a dumpling in half and see if it looks rubbery inside.  If it’s white all the way through, it’s done.

If you want your soup to be thicker, you can whisk together 1/4 cup flour and 1/2 cup of half & half or milk, making sure you get all the lumps out.  Add this to the chicken & dumplings and stir until the soup is thickened.  Another option is to add a couple cans of cream of chicken soup or my homemade cream of chicken soup mix.

Ladle into soup bowls and prepare to be complimented.  🙂

I know you will enjoy this Chicken & Dumplings recipe.  Trust me that it is worth every bit of work that goes into making it.

Pin it!  http://www.pinterest.com/pin/280278776783980358/

If you like my recipes, be a sweetie pie and share on Facebook,
Like my page “I Love To Cook” and Pin these yummy recipes on Pinterest.  🙂

Sharon Springfield

Sharon Springfield  

Sharon Springfield on PinterestSharon Springfield on FacebookFollow Me On Google+

http://sharonspringfield.com/images/cooking-blog-logo.jpghttp://sharonspringfield.com/wp-content/uploads/2013/07/youtube-150x150.jpg


Powered by Wordpress Plugins - Get the full version!

Chicken and Dumplings Recipe


Cabbage Rolls

Cabbage Rolls


Cabbage Rolls Recipe

This recipe for cabbage rolls is from my mother-in-law.  When I married her son, I asked her to share with me some of his favorite recipes so that I could “make it like Mom made it”.  My hubby always appreciates it when I take the time to make his mom’s Cabbage Rolls, which always makes me happy too!  I hope you enjoy the recipe. 🙂


Cabbage Roll Filling Ingredients:

1 pound ground chuck
1 cup cooked rice
1 egg, beaten
1/3 cup Worcestershire sauce
1 small onion, chopped
1 red bell pepper, chopped
dash of salt & pepper
dash of garlic powder
dash of cayenne pepper
Steamed cabbage leaves

Cabbage Rolls Sauce Ingredients:

2 cups tomato sauce
1 tablespoon apple cider vinegar
1 tablespoon sugar
dash of garlic

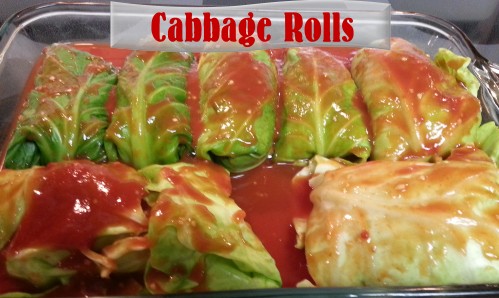
Mix uncooked meat, cooked rice, onion, peppers and seasonings in a large bowl.  Place some meat mixture in the middle of a cabbage leaf and roll up.  (like you’d roll up a burrito)

Place the cabbage rolls in a 9×13″ glass baking dish or cast iron bakeware.  Pour sauce over the top.  Cover baking dish with foil.  Bake in a 350º F oven for 40 minutes or until the meat is cooked through.

Cabbage Rolls Recipe

Pin it!  Here’s the link: http://www.pinterest.com/pin/280278776783963074/

 Sharon Springfield

Sharon Springfield

 Sharon Springfield on Facebookhttp://sharonspringfield.com/wp-content/uploads/2013/07/youtube-150x150.jpgSharon Springfield on Pinteresthttp://sharonspringfield.com/images/cooking-blog-logo.jpg

Crockpot Balsamic BBQ Beef

Crockpot Barbecue Beef

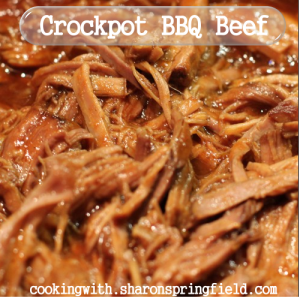
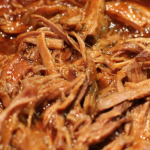
This is a delicious crockpot bbq recipe with a surprise secret ingredient. Read on to find out what it is… I saw a recipe on Pinterest for Balsamic shredded beef which I started out to make, until I realized that I was out of brown sugar. Time to improvise. 😉 So I started scrounging around in the pantry and fridge for an ingredient to substitute for the brown sugar. I settled upon something sweet and brown and one of my favorite things to eat. Once I had dumped all the ingredients into the crock pot, put the lid on, and turned it to low, I ran out the door and headed to work. When I returned home, I took the roast out of the crock pot and shredded it. I spooned about 1/2 cup of the liquid from the crock pot over the beef. Fat by itself would be a terrific dinner but I had barbecue on the brain so I dumped in some sweet baby rays barbecue sauce and mixed it in. I wrapped up the barbecue in a low carb wrap with some shredded cheddar cheese and some French’s fried onions. This was truly the best crock pot balsamic barbecue beef I have ever had. Give this recipe a try and if you like it share it with your friends pin it on your Pinterest board.

Crockpot Balsamic Barbeque Beef

Ingredients:

4-5 pound chuck roast
1 cup beef broth
1/2 cup apple butter
1/4 cup balsamic vinegar
1 tablespoon soy sauce
Your favorite bbq sauce.  I love Sweet Baby Rays or Sonny’s Sweet Sauce

Directions:

Coat inside of Crockpot with nonstick spray (I coat mine with Crisco)
Cut all the fat off of roast and place into Crockpot.  Add the rest of the ingredients except the barbeque sauce.  Spoon the liquid over the roast, put the lid on the Crockpot and cook on low for about 8 to 10 hours.

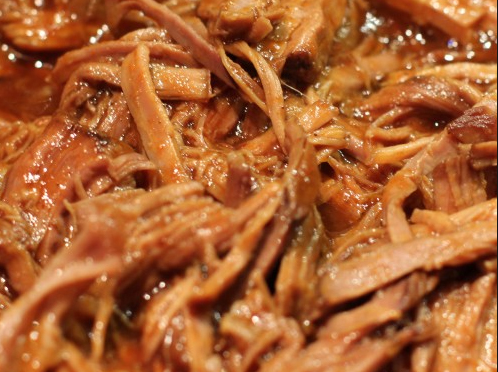
When the meat is tender enough to separate with a fork, remove from crock and put in a casserole dish.  Slice the roast crosswise into 2 inch thick slices then shred the meat with 2 forks.

Spoon a few spoonfuls of the liquid from the Crockpot over the meat to moisten it. You could just eat it like this or if you like, pour barbeque sauce over and mix it in. Serve on buns, garlic Texas toast or, my favorite way, on a low carb wrap.

Crockpot Balsamic BBQ Beef

(I make my famously yummy low carb bbq wraps with bbq beef, shredded cheddar cheese and French’s fried onions.  Wrap it all up and dig in.  It’s soooo good! )

With your leftover Crockpot Balsamic BBQ Beef, you can make Barbecue Pot Pie with Cheese Grits Crust

Barbecue Pot Pie With Cheese Grits Crust

Remember to pin this to your recipes board on Pinterest!

Crockpot Balsamic Barbeque Beef Recipe


Sharon Springfield

Sharon Springfield

 Sharon Springfield on Facebookhttp://sharonspringfield.com/wp-content/uploads/2013/07/youtube-150x150.jpgSharon Springfield on Pinteresthttp://sharonspringfield.com/images/cooking-blog-logo.jpg

Barbecue Pot Pie with Cheese Grits Crust

Barbecue Pot Pie with Cheese Grits Crust

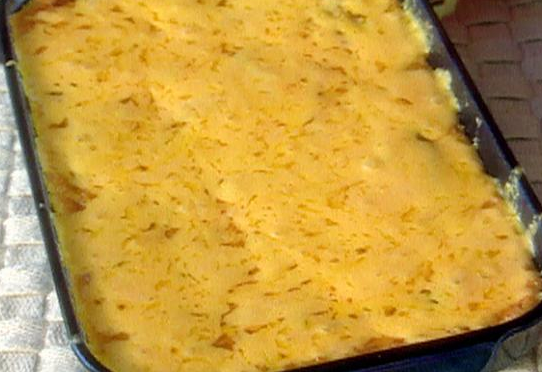
Barbecue Pot Pie With Cheese Grits Crust

This mouth watering casserole is something you must try.  I use a sweet BBQ sauce and lots of sharp cheddar cheese in the cheese grits crust.  I promise, this is one tasty casserole that you will love!

1 large sweet onion, diced
1 tablespoon vegetable oil
2 tablespoons all-purpose flour
1 1/2 cups thick barbecue sauce
1 1/2 cups beef broth
1 pound shredded barbecued pork*
Cheese Grits Crust Batter* recipe follows
Cheese Grits Crust Batter*
2 cups water
2 cups milk
1 cup quick-cooking grits
2 cups (8 ounces) shredded sharp Cheddar cheese
3/4 teaspoon salt
1/2 teaspoon seasoned pepper
dash of garlic powder
2 large eggs, lightly beaten

Cheese Grits Crust:

Bring water and milk to boil in a large saucepan; add grits, and cook, stirring often, 5 minutes or until thickened. Stir in cheese, salt, and pepper; remove from heat.
Stir about one-fourth of grits mixture gradually into beaten eggs; add to remaining grits mixture, stirring constantly.
Spoon hot grits mixture evenly over hot Barbecue Pot Pie mixture.
Bake at 425° for 15 minutes.
Yield Makes 1 (13X9 inch) crust

Barbecue Beef

Barbecue:

Sauté onion in hot oil in a large skillet over medium-high heat 5 minutes or until golden brown. Stir in flour, and cook, stirring constantly, 1 minute. Gradually stir in barbecue sauce and beef broth; cook, stirring constantly,
3 minutes or until mixture begins to thicken. Stir in pork, and bring to a boil. Remove from heat, and spoon mixture into a lightly greased 13- x 9-inch baking dish.
Spoon Cheese Grits Crust Batter evenly over hot barbecue mixture.
Bake at 425° for 20 to 25 minutes or until golden brown and set.
*1 pound shredded beef may be substituted for pork.
Yield 8 to 10 servings

Barbecue Pot Pie with Cheese Grits Crust

Sharon Springfield

Sharon Springfield

 Sharon Springfield on Facebookhttp://sharonspringfield.com/wp-content/uploads/2013/07/youtube-150x150.jpgSharon Springfield on Pinteresthttp://sharonspringfield.com/images/cooking-blog-logo.jpg

Chicken Sonora

Chicken Sonora


Chicken Sonora

One of my favorite and fastest dinners. A copy-cat of Ruby Tuesday’s dish.  Also great as a meatless dish if you omit the chicken.

1 pound chicken breasts, cooked and chopped 
1/2 package penne or ziti
1 12 oz. jar Alfredo sauce with sun dried tomatoes
1 16 oz. can black beans
1 10 3/4 ounce can Rotel Tomatoes

Grill or broil chicken and cut into bite-sized pieces. Boil pasta according to pkg. directions. Drain Rotel Tomatoes and black beans – rinse beans. Combine all in a pan and warm through. Serve with garlic bread and a salad.

8 Servings

Chicken Sonora

Pin It!  http://www.pinterest.com/pin/280278776783622170/

Sharon Springfield

Sharon Springfield

Sharon Springfield

Sharon Springfield on Facebookhttp://sharonspringfield.com/wp-content/uploads/2013/07/youtube-150x150.jpgSharon Springfield on Pinteresthttp://sharonspringfield.com/images/cooking-blog-logo.jpg